Sublime was a text editor the team used to use when we used WSL1. When we upgraded to WSL2 we moved to Visual Studio Code.
Here are the instructions we used to use for installing Sublime.
Sublime
Sublime is a power text editor which helps you write and edit clean code. It is free to download and use and at some point they would like us to purchase it. We have yet to purchase it. The newest version is 4. If you are using your own text editor it is completely ok for you to keep using it. Otherwise, I recommend you install Sublime as that is what everyone else is using. Most of us are using Sublime 3, but since Sublime 4 is stable I recommend you download and work with that.
You may download Sublime at sublimetext.com.
Once you have downloaded Sublime open it and install the following packages. To do so go to Preferences>Package Control and select Package Control: Install Package
Before we move on to installing some packages into Sublime let us install NodeJS. To install NodeJS go to https://nodejs.org/en/download/ and download and install. It is possible it is already install on your machine.
Now that you have installed NodeJS, let us go back to Sublime and install some packages which will add functionality to Sublime.
Then install the following packages:
- SublimeLinter
- SublimeLinter-csslint
- SublimeLinter-html-tidy
- SublimeLinter-jshint
- SublimeLinter-php
- Twig
- PHP-Twig
- HTML-CSS-JS-Prettify
- JSONLint
- insLESS
- Less2Css
- CleanCSS
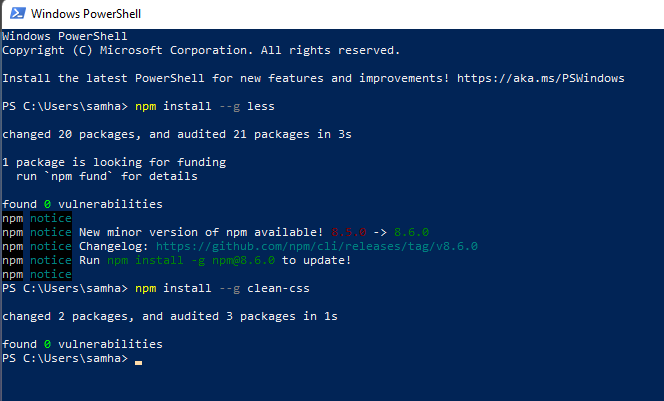
Now that we have added those packages in Sublime, let us go install less and clean-css in Windows. Open you Windows Power Shell and enter these commands in the command prompt.
npm install --g less
npm install --g clean-css
Once complete with that install, you can close Power Shell and return to Sublime. Once in Sublime select Preferences>Package Settings>Less2Css>Settings - User. Once there paste the below text into the file:
{
"autoCompile": true,
"createCssSourceMaps": false,
"ignorePrefixedFiles": false,
"lessBaseDir": "./",
"lesscCommand": false,
"main_file": false,
"minify": false,
"minName": false,
"outputDir": "./",
"outputFile": "", //[example.css] if left blank uses same name of .less file
"showErrorWithWindow": true,
"autoprefix": false,
"disableVerbose":false,
"silent":false
}
At this time if you are curious about Less this is a good intro and tutorial. Following that tutorial if you now want to test that Less is installed and set up in Sublime you can verify by simply creating and saving a .less file. With this said, it will be a long time before you use Less so if it does not work, just note it and move on.