Pushing to Live
In this phase you will push the updated DEV to TEST and eventually to LIVE. Using the Pantheon dashboard you will push the code up to TEST. You will then thoroughly quality control (test) the TEST site. Once you confirm that TEST is working properly and Sam has approved you pushing it to LIVE you will push it LIVE.
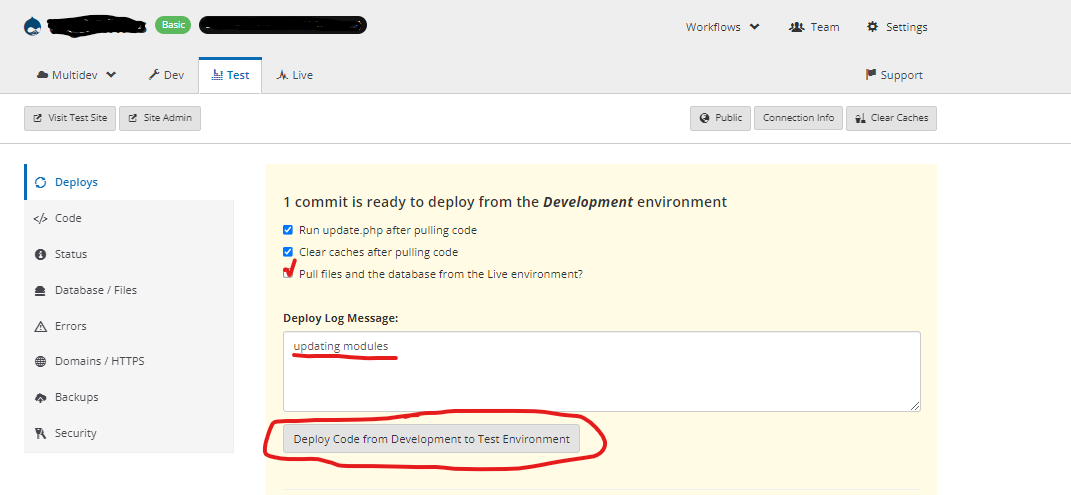
Step 1. Go to TEST environment on the Pantheon dashboard. On the left nav click "Deploys". Then check "Pull files and database from the Live environment". After that type your log message "updating modules" or "Core and module updates" into the "Deploy Log Message" box. Once done click "Deploy Code from Development to Test Environment".
Step 2. In Ubuntu, making sure you are in the website's folder, enter the command "ahoy dbcc test" to clear cache and update the database in TEST.
Step 3. In TEST, review admin>reports>available updates to confirm all the updates went up and that there are none pending.
Step 4. In TEST, review admin>reports>recent log messages to see if there are new errors that previously were not there.
Step 5. In TEST, review admin>reports>status report to confirm there are no new error messages and that the updates have gone through.
Step 6. In TEST, click around the website starting with the front page and do a visual inspection that everything looks the way it should.
Step 7. Get Sam's approval to push code from TEST to LIVE.
Step 8. Back-up live again on the Pantheon dashboard.
Step 9. Go to LIVE environment on the Pantheon dashboard and enter your log message of "Core and module updates" and click "Deploy Code from Development to Test Environment".
Step 10. In Ubuntu, making sure you are in the website's folder, enter the command "ahoy dbcc live" to clear cache and update the database in LIVE.
Step 11. In LIVE, review admin>reports>available updates to confirm all the updates went up and that there are none pending.
Step 12. In LIVE, review admin>reports>recent log messages to see if there are new errors that previously were not there.
Step 13. In LIVE, review admin>reports>status report to confirm there are no new error messages and that the updates have gone through.
Step 14. In LIVE, click around the website starting with the front page and do a visual inspection that everything looks the way it should.
Step 15. Record in Jira the time you spent updating this website.